Introduction
This page describes how to connect to MUN's wireless network
using the ASUS Eee PC running Linux without having to install a new
operating system.
As shipped, the Eee can connect to networks using WEP
and WPA Personal authentication, but does not appear to support
WPA Enterprise out of the box, which is used by MUN's network.
Fortunately, the community have produced a workaround to address this
problem.
To allow the Eee to connect to MUN's wireless network, you can follow
the
instructions, at the eeeuser.com
wiki. These instructions use the command line extensively to
backup/install software and to modify several configuration files.
If you are not comfortable using the command line, you can follow the
(hopefully) simpler instructions below. These instructions make limited
use of the command line to run a script called eee-wpatch.sh that
requests your wireless credentials, installs all the necessary software
and modifies the configuration files for you.
Disclaimers
-
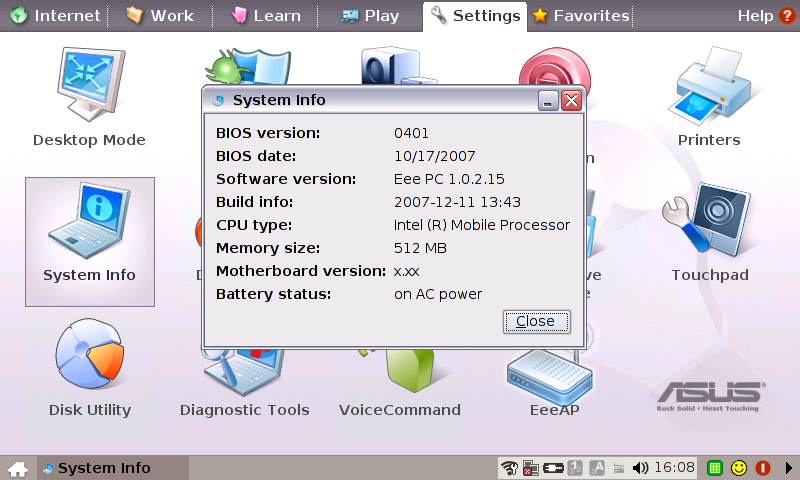
This patch was tested on Eee PC version 1.0.2.15 with
build date 2007-12-11 13:43 (this information
is displayed by the System Info icon in the Settings
tab). It is not known if it will work with other versions of the Eee
software/hardware. In particular, it is unlikely that these instructions
will work for a different operating system running on the Eee.
-
It is not known whether the Eee will be able to connect
to WEP encrypted networks after following these instructions.
-
ASUS may provide updated software in the future which
may make the instructions below unnecessary.
-
These instructions may conflict with software updates delivered by
ASUS, particularly ASUS updates related to wireless networking.
It may be necessary to restore the Eee to factory settings in order
to apply ASUS updates.
-
You should use these instructions only if all previous attempts to
connect your Eee to MUN's wireless network have been unsuccessful.
-
These instructions are provided without warranty.
-
Using another computer, download the
eee-wpatch.sh
script and store it on a USB key or SD card.
-
Boot the Eee PC
-
Insert the USB Key or SD card.
-
After a few seconds, the Removable Device dialog box should
be displayed automatically.
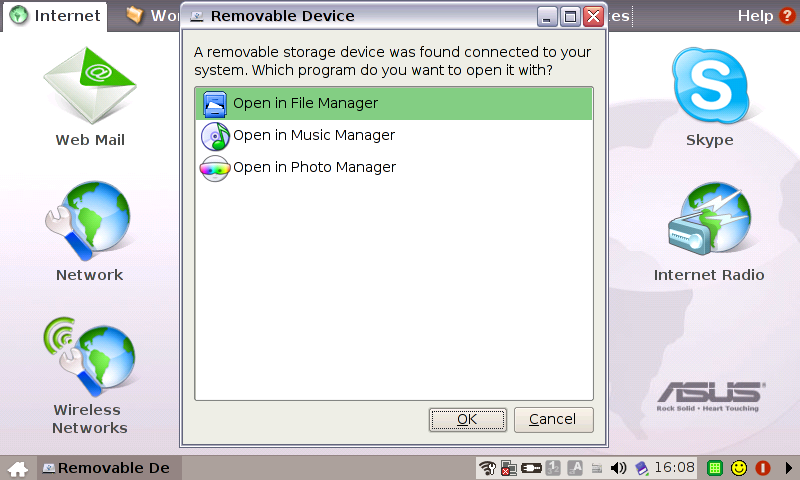
-
Select Open in File Manager (if it isn't already selected)
and click OK to browse the USB Key or SD card using File
Manager.
-
If you have any important files on the Eee, now would be a
good opportunity to back them up to the USB key or SD card, just
in case the eee-wpatch.sh script encounters problems.
-
Navigate to the folder containing the eee-wpatch.sh script
on the USB key or SD card using File Manager. There may be
other files in the folder — that's not a problem.
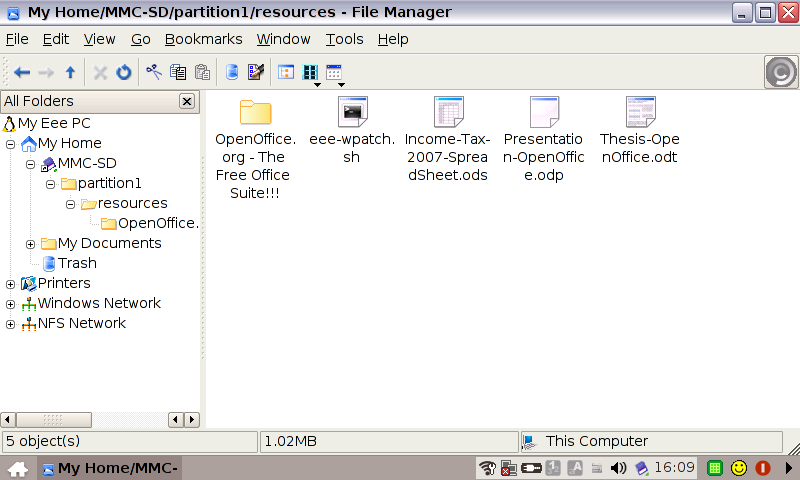
-
When you are in the folder containing the script, press Ctrl-T
to open a console window.

-
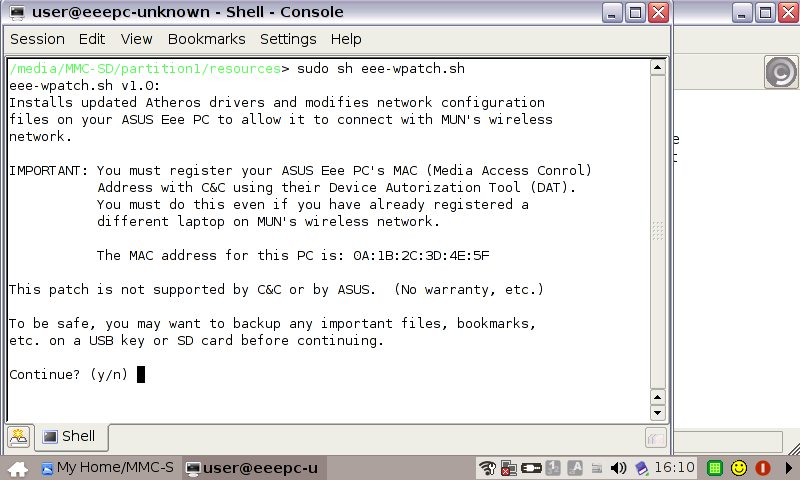
Type the following command exactly as shown after the prompt character
'>' and press Enter.
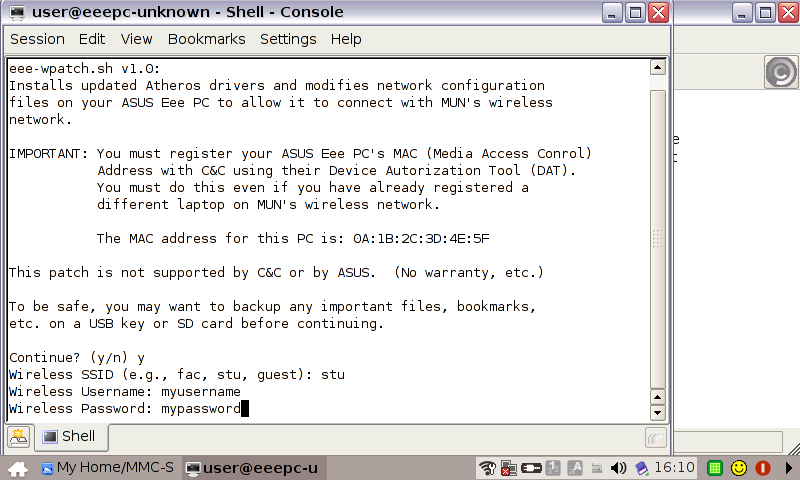
sudo sh eee-wpatch.sh
-
If you haven't done so already, use another computer to register the
Eee's MAC (Media Access Control) address with C&C using their Device
Authorization Tool (DAT). (The MAC address is displayed by the
eee-wpatch.sh script.) You'll need the SSID, username and password
to login to the network. When you have this information press y
and Enter to start the re-configuration process.
-
Provide your SSID, username and password.
-
The script will install updated drivers and modify the appropriate files.

-
Reboot the PC
Connecting to MUN's Wireless Network
Once the PC has been restarted, you should be able to connect to MUN's
wireless network (if the eee-wpatch.sh script was successful).
Whenever you want to connect to the wireless network, only the following
steps are required (there's no need to re-run the eee-wpatch.sh
script every time you want to connect).
-
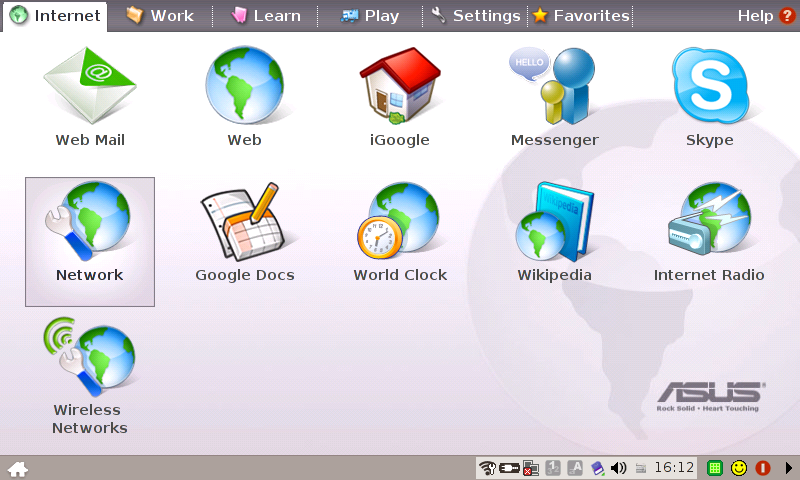
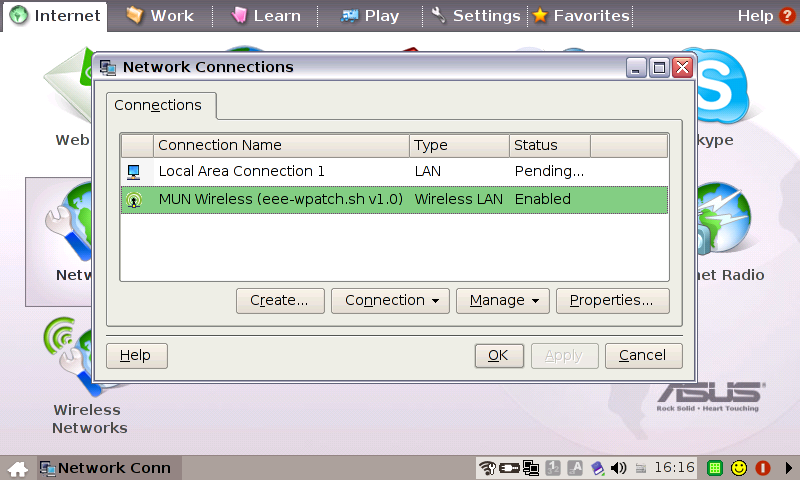
Click the Network icon in the Internet tab.
-
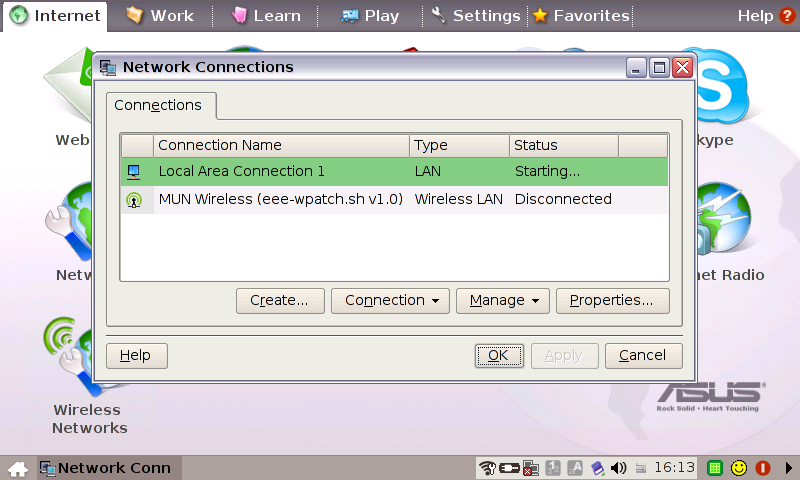
This brings up the Network Connections dialog box.
-
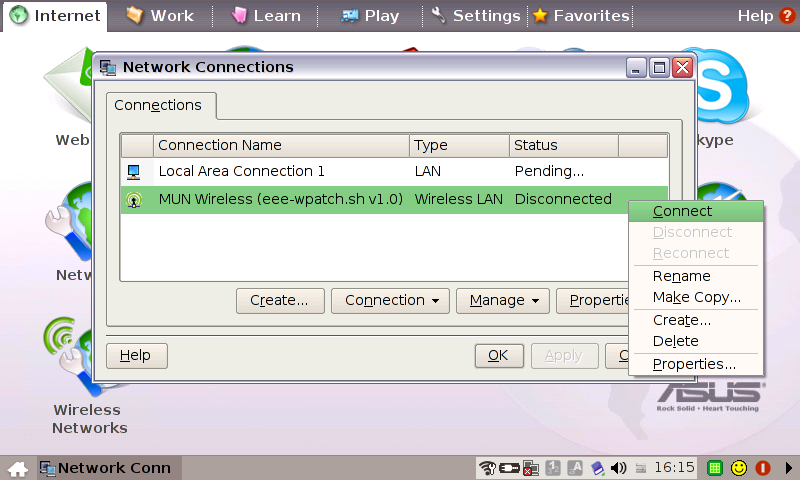
Right-click MUN Wireless (eee-wpatch.sh v1.0) and
select Connect from the context-menu.
-
An attempt will be made to connect to the wireless network.
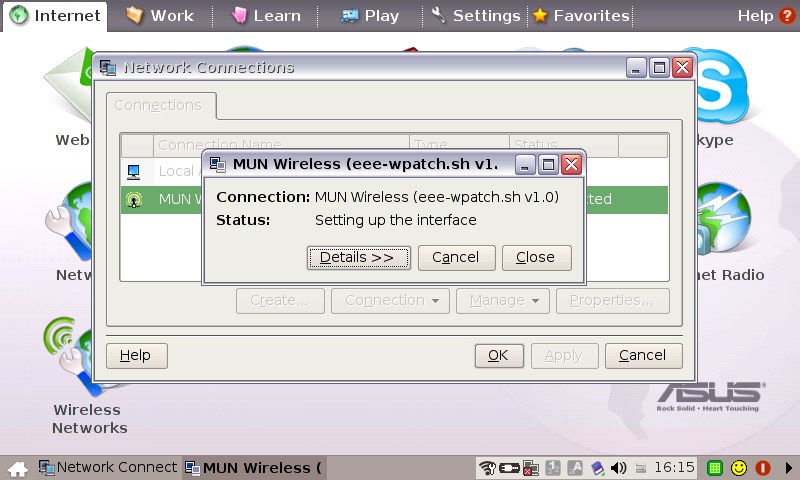
-
Be patient, as the authentication can sometimes take a while.
-
Once the connection has been established, you can close the Network
Connections dialog box. If a connection wasn't established,
see the Notes section below.
Notes
-
If you typed the SSID, login name and/or password wrong, just redo the
sudo sh eee-wpatch.sh command again, supplying the correct
information.
-
You can have the Eee PC connect automatically to MUN's wireless on
boot by clicking on the Properties button in the
Network Connections dialog box and changing the Start mode
property from Manual to On Boot.
-
MUN's wireless network has been known to be stressed in some
areas on campus. If you cannot connect, try moving to a different area,
if possible.
-
Reconnecting to MUN's wireless after a disconnection may result in the
MAC address
changing. If the MAC address reported by the Eee is different than
the address that you registered, then you will not be able to connect.
Rebooting the Eee should restore the MAC address.
-
If all else fails, try restoring the Eee to its factory settings and
repeating the above procedure.This will delete any files you created on the Eee PC so backup
any important files to a USB key or SD card before doing this.
To restore the factory settings, follow these steps:
-
Restart the computer
-
Press and hold F9 while it is booting.
-
Select Restore Factory Settings.
-
Enter yes to confirm then press Enter to reboot.
-
You'll have to go through the license, keyboard, timezone settings,
etc. again when the Eee is restarting.
-
Follow the Installing WPA Enterprise
support using the eee-wpatch.sh script procedure again.
References
Donald Craig (donald@mun.ca)
Last modified: April 16, 2008 19:24:37 NDT
